
Using the Apple Studio Display on a Windows Computer
2023-07-22
I recently switched back to Windows from macOS. My work desk’s display has been an Apple Studio Display for a while. Despite the product’s lukewarm popularity, I personally really like it, and it’s the best display I’ve ever used:
- The built-in six-speaker system sounds so good that it competes with dedicated desktop speakers, and I don’t need to clutter my desk with speakers anymore. No, I’m actually pretty good at judging audio quality, and independent reviews confirm my assessment.
- The built-in USB-C hub is really useful.
- It charges laptops (up to 96W) but doesn’t have a power brick, because the Power Supply Unit is built into the display. This is actually pretty hard to accomplish while keeping the display cool and quiet, more on that over at iFixIt.
- Excellent image quality, brightness and color accuracy, 5K resolution and very low latency.
The built-in microphone array and webcam are mediocre, but in general, it’s a fantastic display, and I didn’t want to have to replace it just because I switched back to Windows.
However, getting the thing to work on Windows computers is complicated for two reasons: connectivity and drivers. I’m writing this post to help other people who may have run into this same situation, so that I can share my solution to the problem of using the Apple Studio Display on almost any Windows computer.
Connecting the display
The Apple Studio Display only connects via Thunderbolt 3. If you want to use all of its features, you have a very strict set of ways with which you can connect it to your computer:
Laptops
In my case, I needed to get the display working on a laptop equipped with Thunderbolt 4, so I just plugged the display into my Thunderbolt 4 port and almost everything worked immediately: the display, speakers, microphone array, webcam, and laptop charging. Great! This should be your experience with Thunderbolt 3 and USB4-equipped laptops as well.
If your laptop does not have Thunderbolt 3, Thunderbolt 4 or USB4, don’t bother trying to get the Studio Display to work. You’re out of luck, sorry.
Desktops
Using the Studio Display on a non-Mac desktop computer is a bad idea and I don’t personally recommend it. Getting the Studio Display to connect properly on desktops is harder than it is for laptops, you will most likely not end up being able to use the built-in speakers or USB-C hub, etc – it’s not great.
- DisplayPort (for Discrete GPUs): You can connect the display to a DisplayPort on your GPU’s DisplayPort if and only if your GPU supports DisplayPort 1.4 or higher and you use a DisplayPort 1.4 8K to USB-C cable. You have to make sure you get the right cable, otherwise it won’t work. Here’s an example of a good cable.
- Thunderbolt 3, Thunderbolt 4, or USB4 (for Integrated GPUs): if you’re fine using your integrated GPU and your motherboard has a Thunderbolt 3, Thunderbolt 4 or USB4 port in USB-C format, then just plug it in and it should work fine. You can also buy a Thunderbolt 4 expansion card and install it in a free PCIe slot, and that should work fine too.
Installing the drivers
Why you’ll still need drivers: you’ll still need to install Apple’s drivers for Windows for three reasons:
- Controlling display brightness,
- Controlling display color profile,
- Fix some weird audio issues that crop up sometimes.
Regardless of how you connect the Studio Display via the methods above, those three things won’t work unless you also install the drivers.
Getting the drivers to work on Windows is a pain, because Apple only provides them through its proprietary Boot Camp platform which was initially created to support Windows installations on Intel Macs. However:
- Brigadier allows you to easily download Boot Camp drivers onto any Windows computer. So go ahead and download Brigadier.
- Run the following to download the drivers:
brigadier.exe --m MacPro7,1 - In the resulting
$WINPEDriver$folder, delete all folders except forDolby,AppleAudio,AppleAudio_1883106B,AppleSSD64,AppleUSBVHCI, andSerialIO. This will prevent Boot Camp from installing drivers you don’t need. - In the
BootCamp\Driversfolder, delete everything except for theAppleandPromisefolders. - Using an elevated, administrator-level command prompt, run
msiexec /i BootCamp\Drivers\Apple\BootCamp.msiand click through the resulting installer. - Reboot.
Caveats
Some Apple Studio Display features will never work on Windows:
- Firmware updates: you will need to connect the display to a Mac to install firmware updates. Firmware updates are few and far between, and you can always borrow someone’s MacBook to do it if you really need to, so this isn’t the end of the world.
- True Tone: Apple’s proprietary light sensor technology will only work when the display is plugged into a Mac.
- Center Stage: The webcam’s face-tracking feature will only work on a Mac, but if you have an Nvidia GPU, you can get the same feature with better performance (and with any webcam!) by installing Nvidia Broadcast.
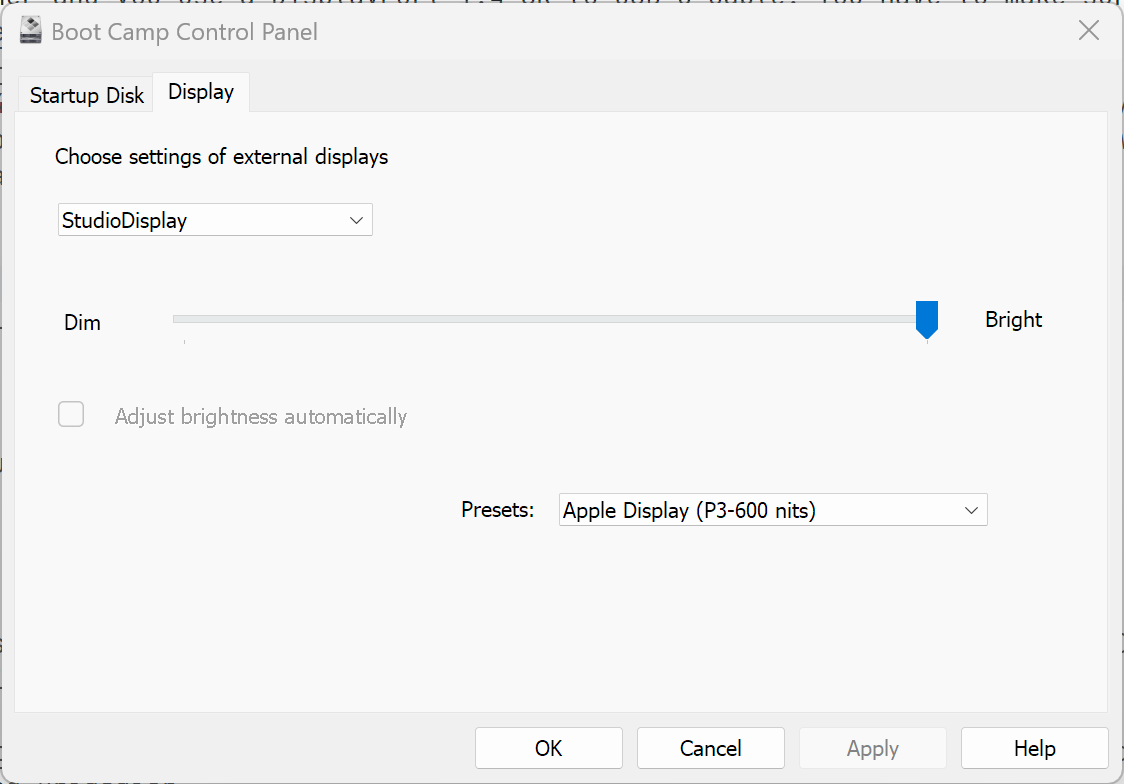
The above was sufficient for me to get a Boot Camp control panel in my system tray after rebooting, and I was finally able to control my display brightness so that I don’t drive myself bright while working at night. I hope this post will be helpful to you, too!
