
Repairing a ThinkPad with a Corrupt Thunderbolt Firmware Chip
2018-10-26Update (Nov. 27, 2018): Lenovo has started rolling out BIOS updates that claim to fix this issue for the ThinkPad P1 as well as other ThinkPads.
I recently completed an exciting repair on my new ThinkPad P1. The repair seemed, to me, almost impossible, but due to the encouragement of a kind and formidably skilled friend, I was actually able to pull it off.
It also appears to be the first time this specific issue was ever successfully repaired, so I feel compelled to share my findings in detail.
The Problem
There is a known problem with the high-end ThinkPads of the past couple of years that for some reason Lenovo has not addressed fully. The problem has been reported by a bunch of Lenovo customers. It was also just today covered in a mainstream laptop blog for what I believe is the first time under the headline “Some recent ThinkPads can be destroyed by changing a UEFI-BIOS setting.”
The problem is essentially the following:
- In modern ThinkPads, there exists an option in the BIOS called “BIOS support for Thunderbolt” or “Thunderbolt BIOS Assist” (depending on the model.)
- Enabling this option will brick your ThinkPad: whenever your ThinkPad is booted, it will immediately show a black screen with a single white (non-blinking) underscore at the top left. The system never seems to POST and no action is possible aside from shutdown.
This very Monday, I received my new ThinkPad. And like many before me, I went into the BIOS and thinking that this option “sounded potentially useful” I turned it on. I certainly didn’t expect it to completely brick my brand new computer.
I spent the next twelve hours trying to fix my ThinkPad, eventually wringing my hands and documenting everything I tried inside this miserable Reddit post. Nothing worked and nobody was able to help. The unanimous consensus was that this issue was impossible to repair and that I needed to RMA my ThinkPad for a new one.
Getting the Motivation
I was really keen about this ThinkPad and I didn’t want to just RMA it, despite the apparent intractability of the problem.
I knew that the issue most likely lay in a bricked BIOS. I mentioned this to my friend Jason who had a simple response: just find the EEPROM chip on which the BIOS is stored, hook up to it using electrical wires and re-flash it with a stock BIOS ROM from Lenovo’s website!
This initially seemed very unlikely to work and even mildly crazy. Sure, I could easily spot an EEPROM chip on a motherboard, but:
- Would I even be able to hook onto the EEPROM chip? (The answer turned out to be easier than expected: a $15 SOIC8 clip that Amazon was able to deliver that same evening!)
- What would I hook the EEPROM chip into? I don’t exactly have EEPROM programming interfaces just lying around. (It turns out, I did, in the form of my Raspberry Pi, which has GPIO pins!)
I still had to run around Paris all day to find electrical wires, though, which I eventually did at St. Quentin Radio, a great little shop with a Mitch Altman-esque spirit to it.
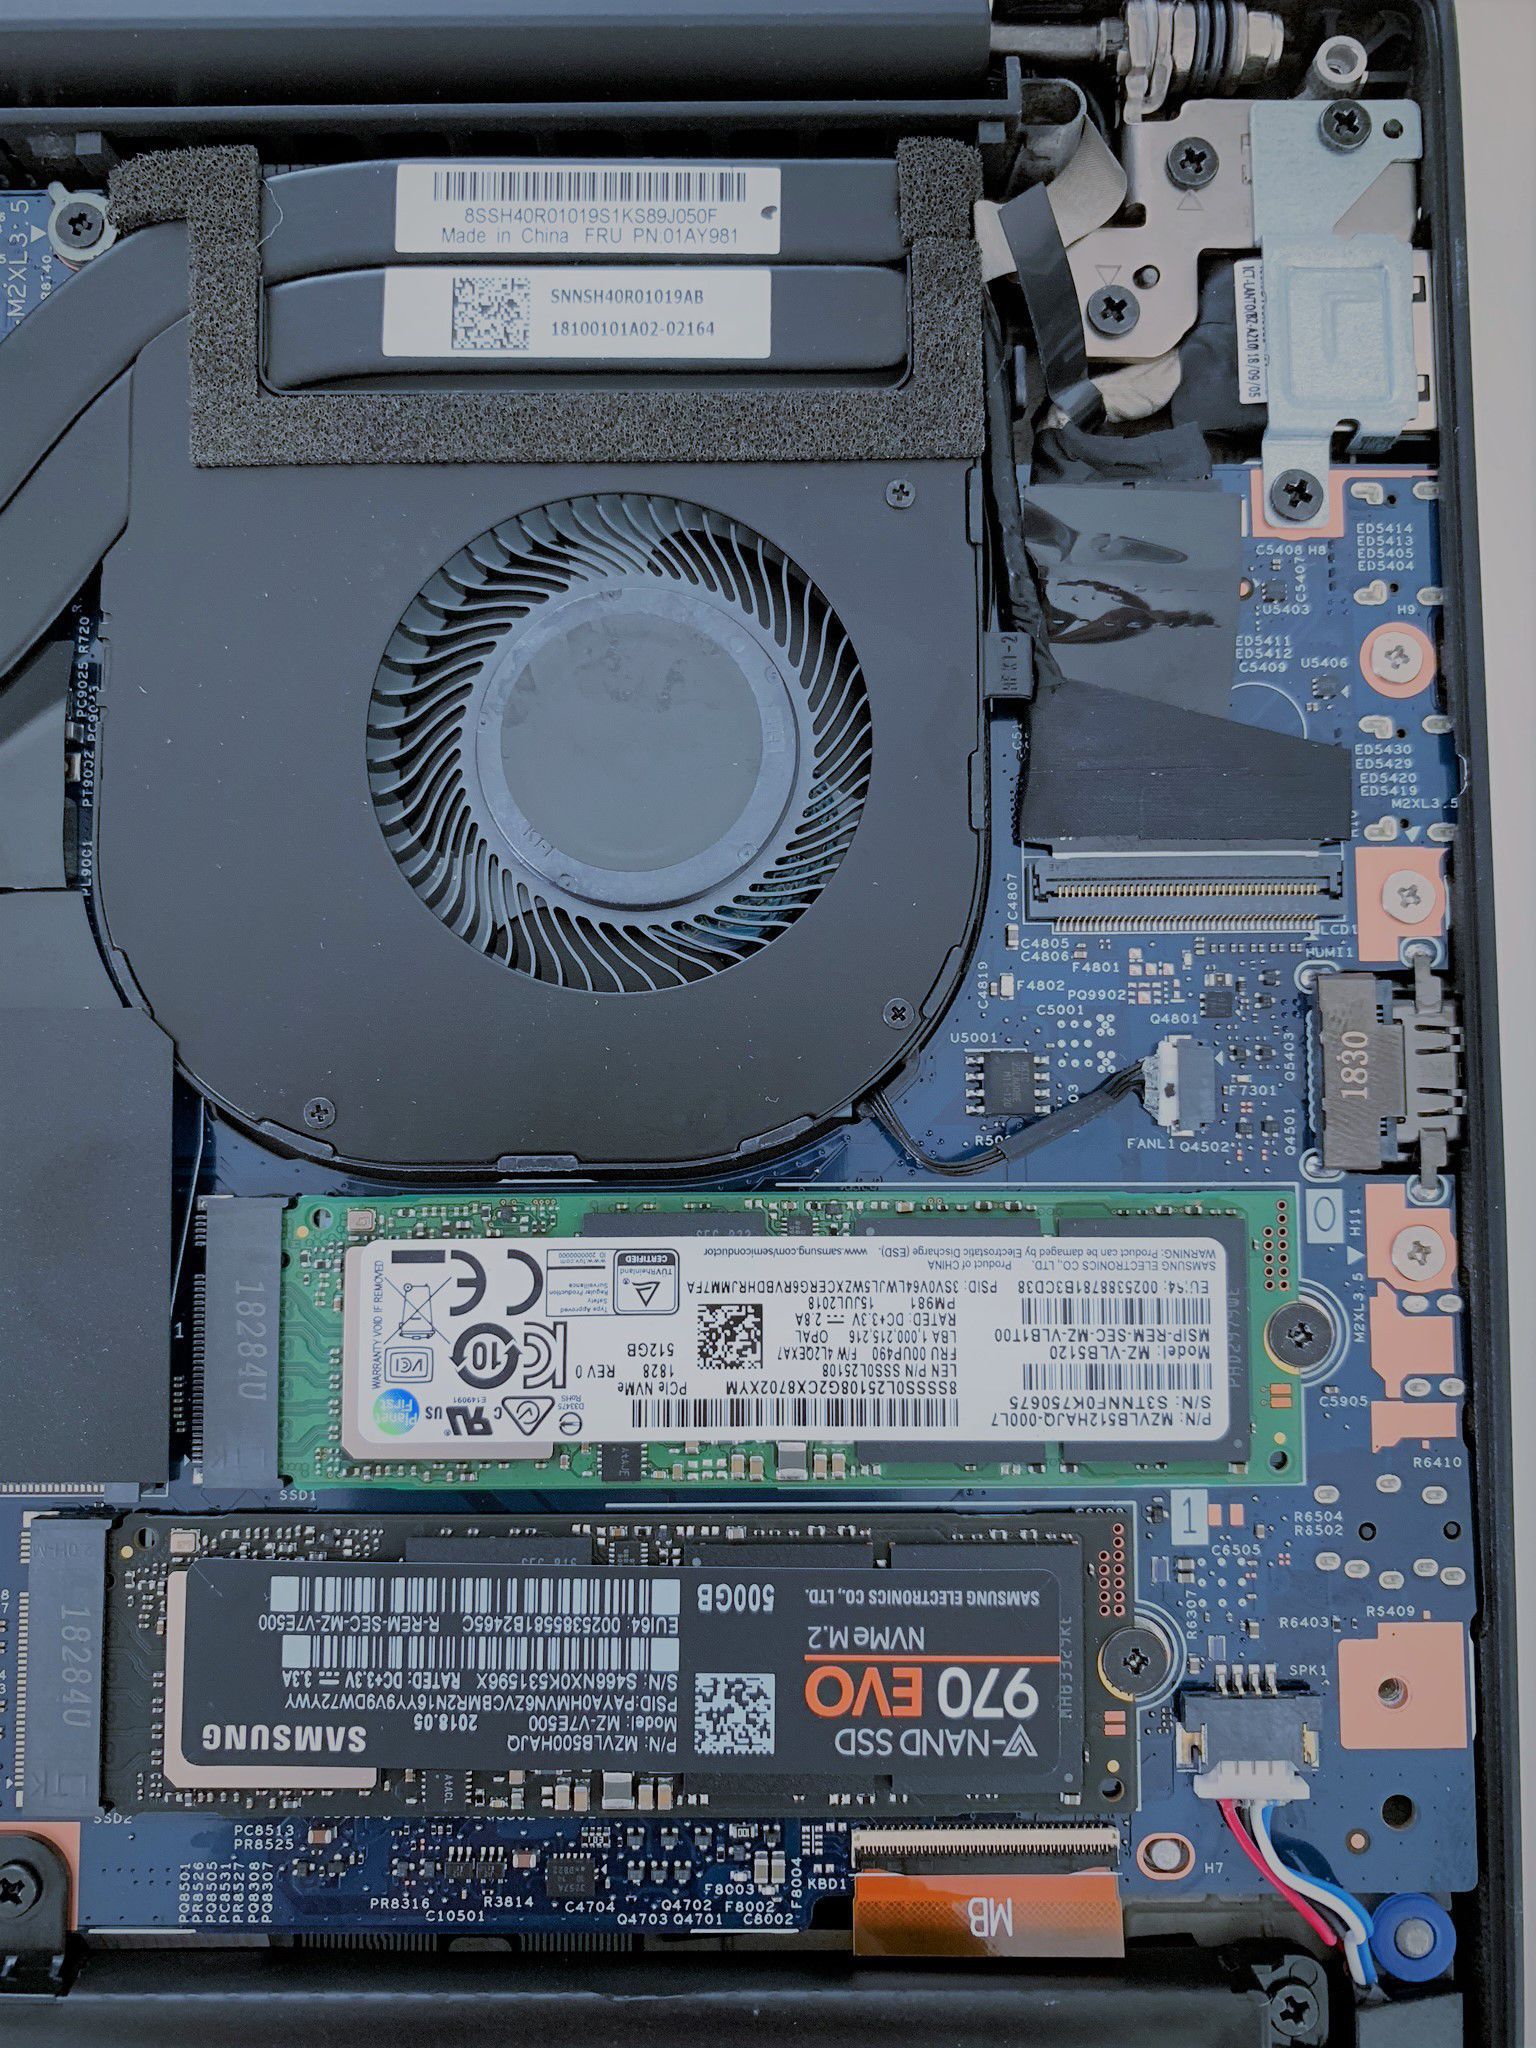
Things began to look up. I opened up my ThinkPad chassis:
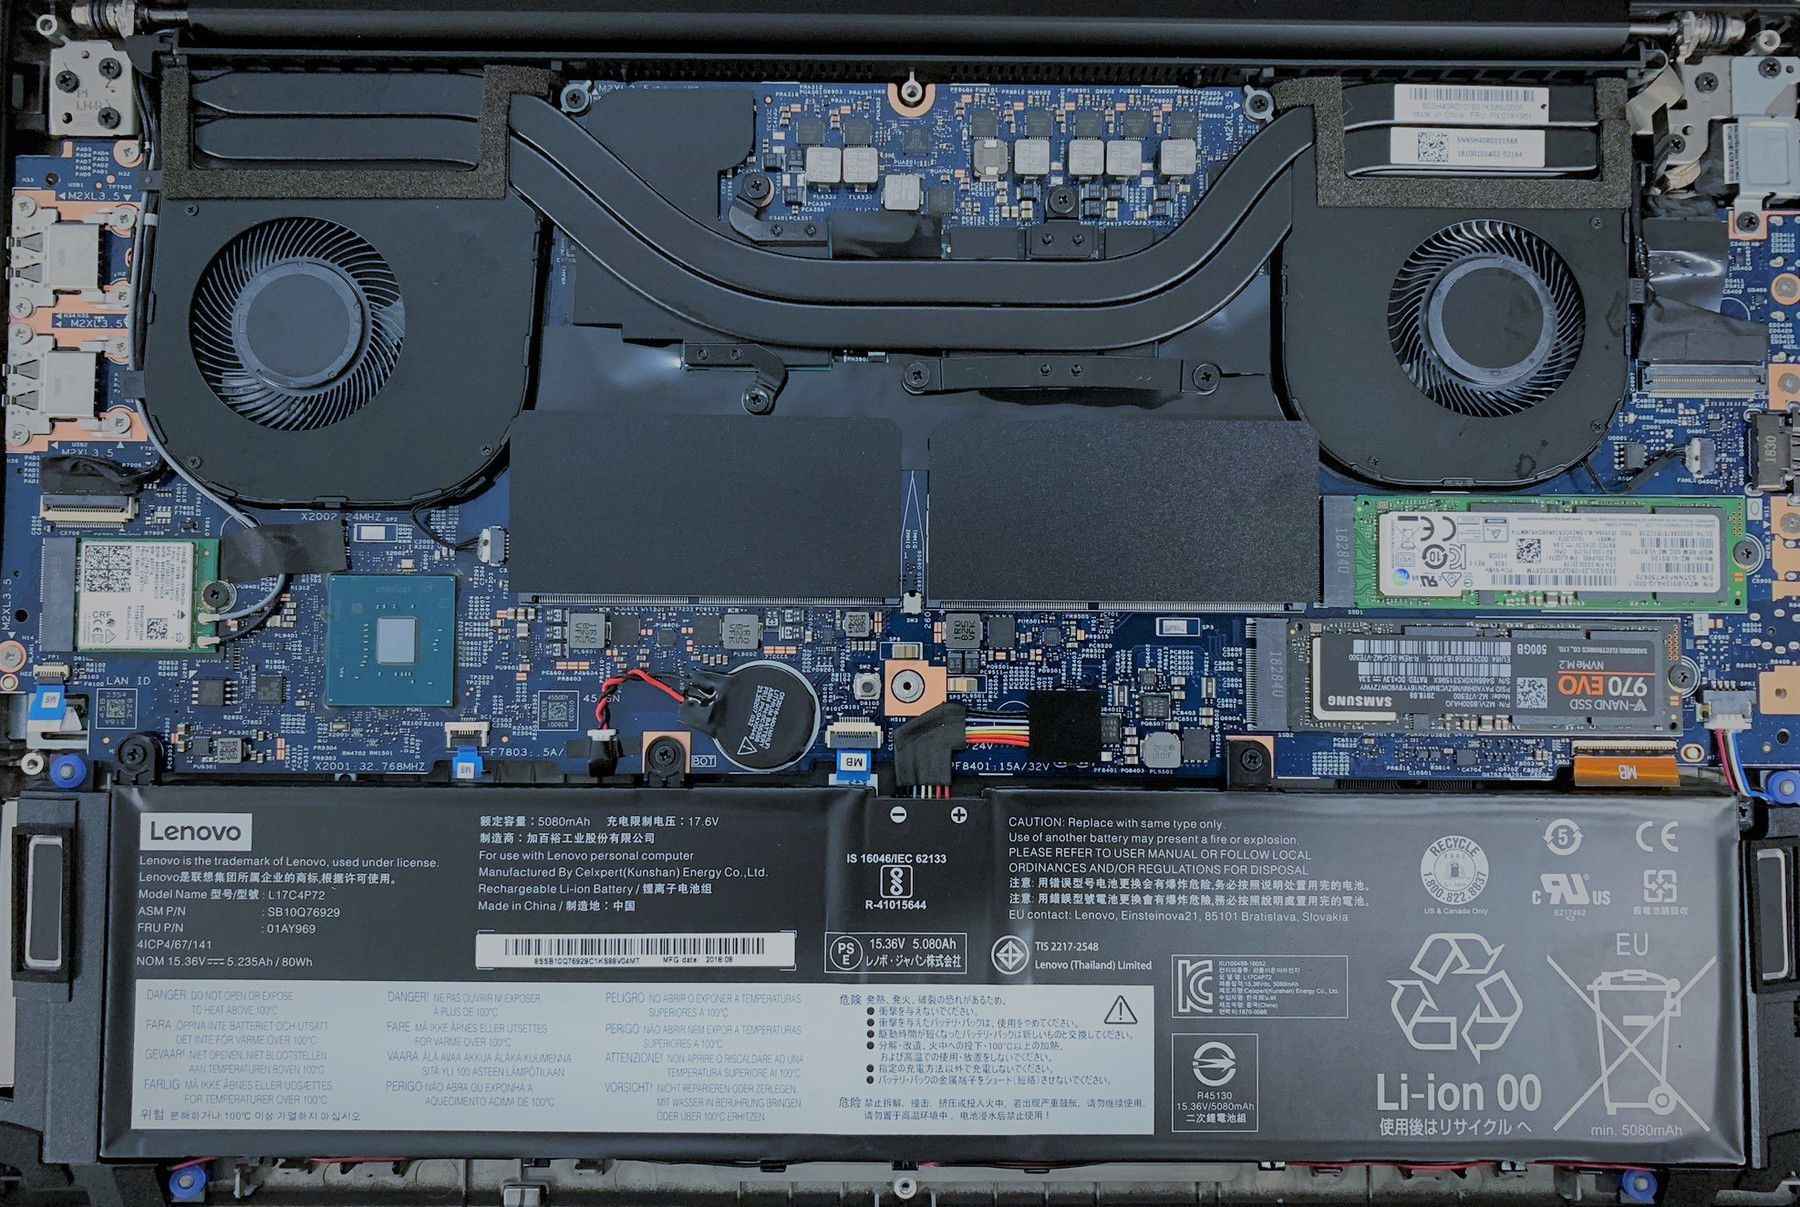
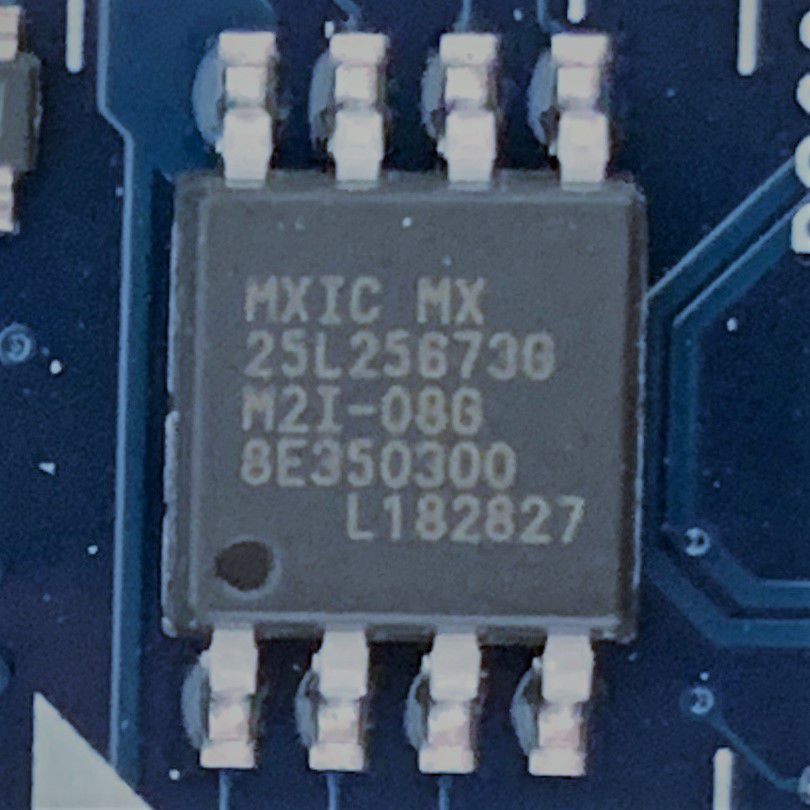
With Jason’s help, I quickly spotted two SPI-type EEPROM chips. They’re both so tiny that it was hard to photograph the model number! The first one (a “big” EEPROM with 32MB of memory) was right under the WiFi adapter:
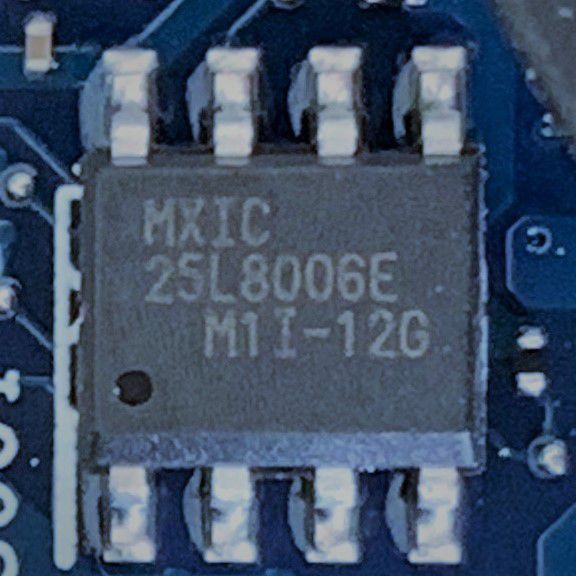
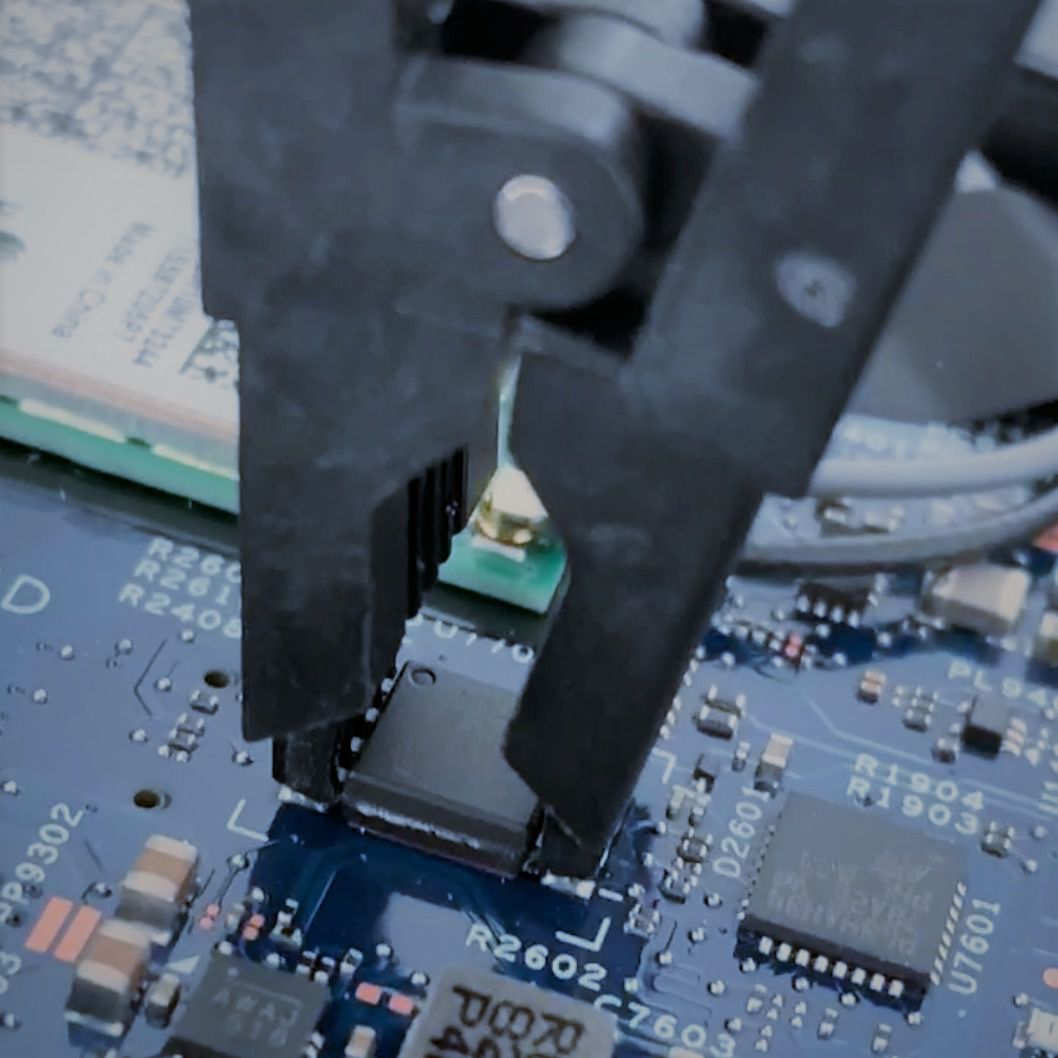
The second (“small” EEPROM chip with 1MB of memory) chip was right above the green SSD:
One of these two chips must be the one holding the BIOS, unless I was unlucky enough (and unless Lenovo was dumb enough) for there to be EEPROM chips on the back of the logic board. A quick Google search gave me the information I needed to understand how to plug into the chips:

Deep Cuts
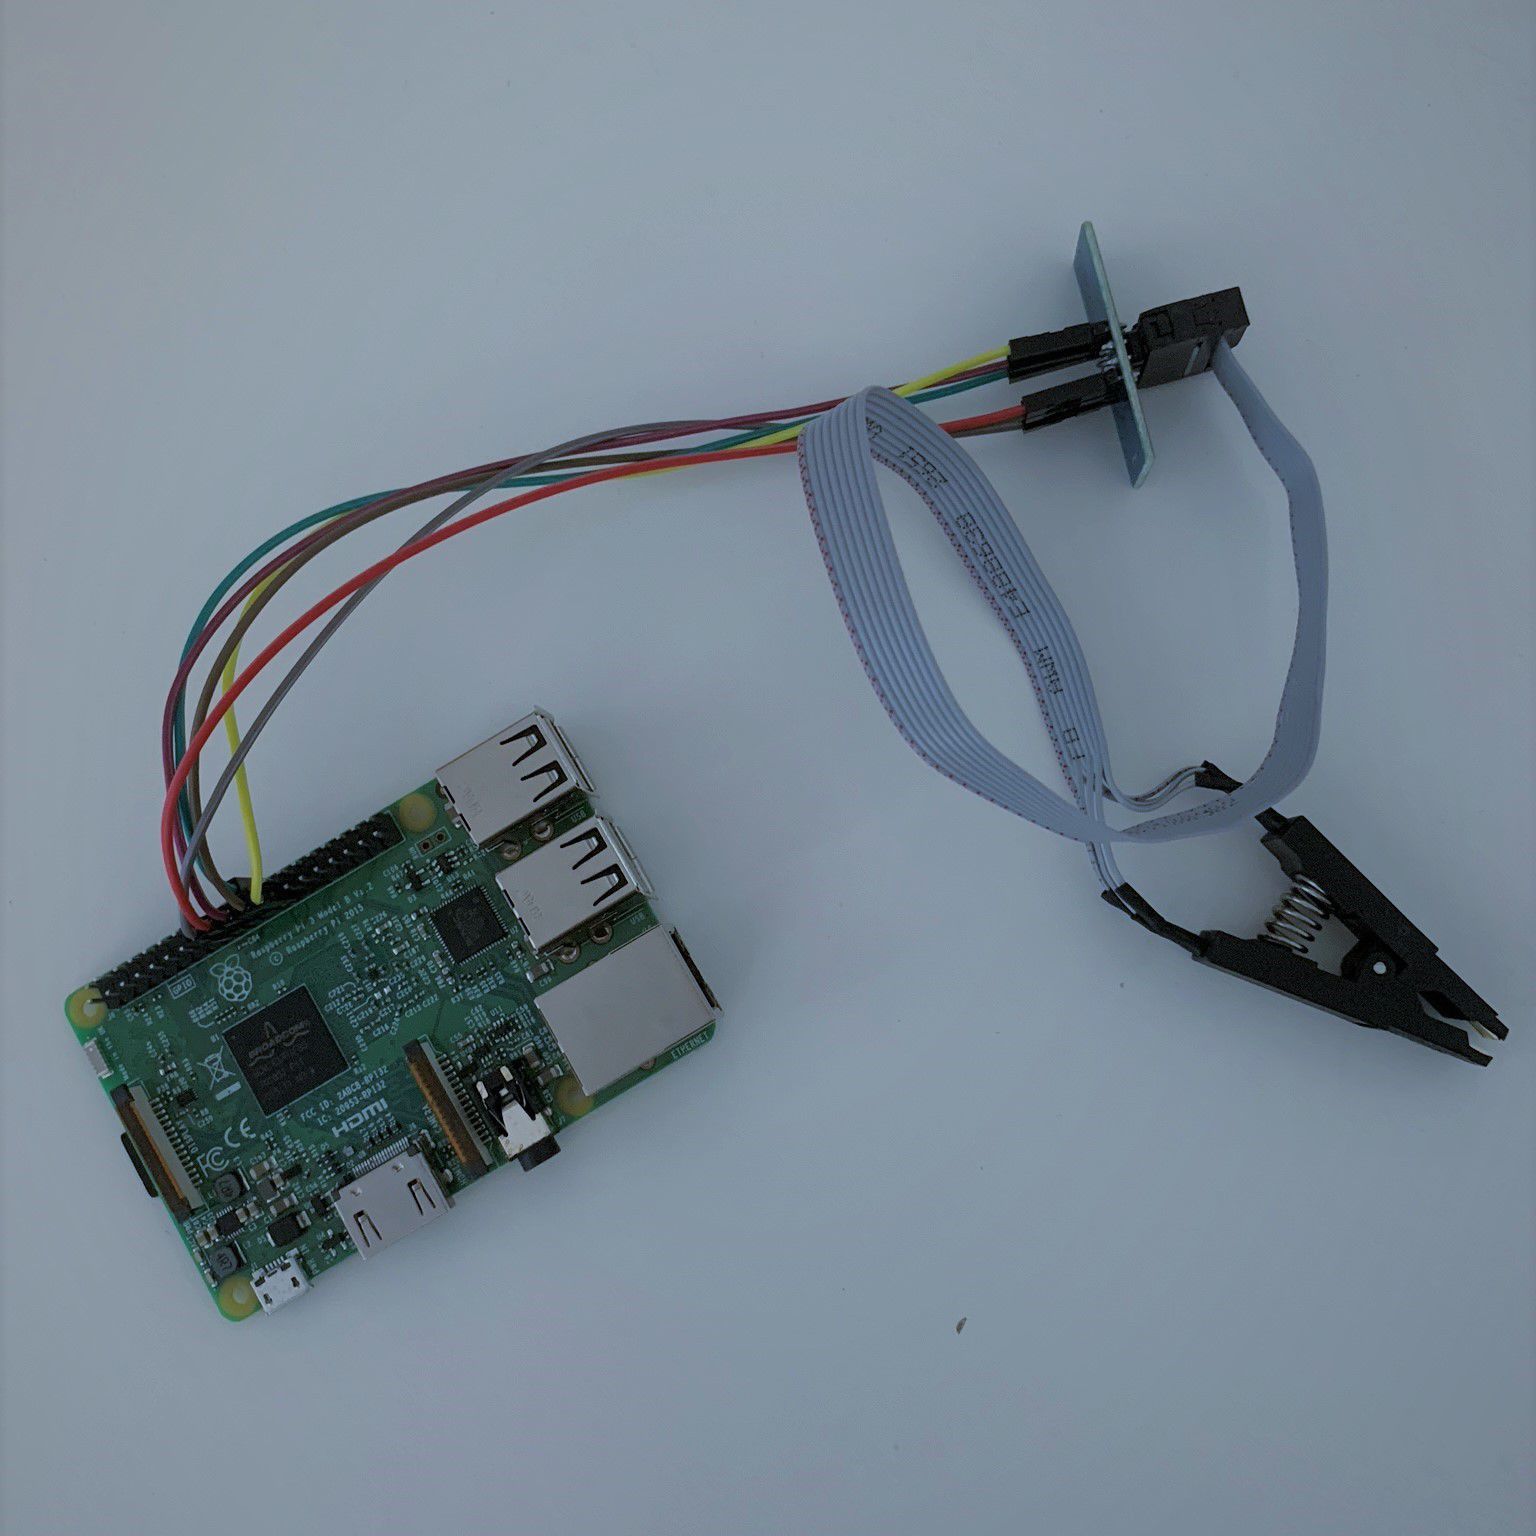
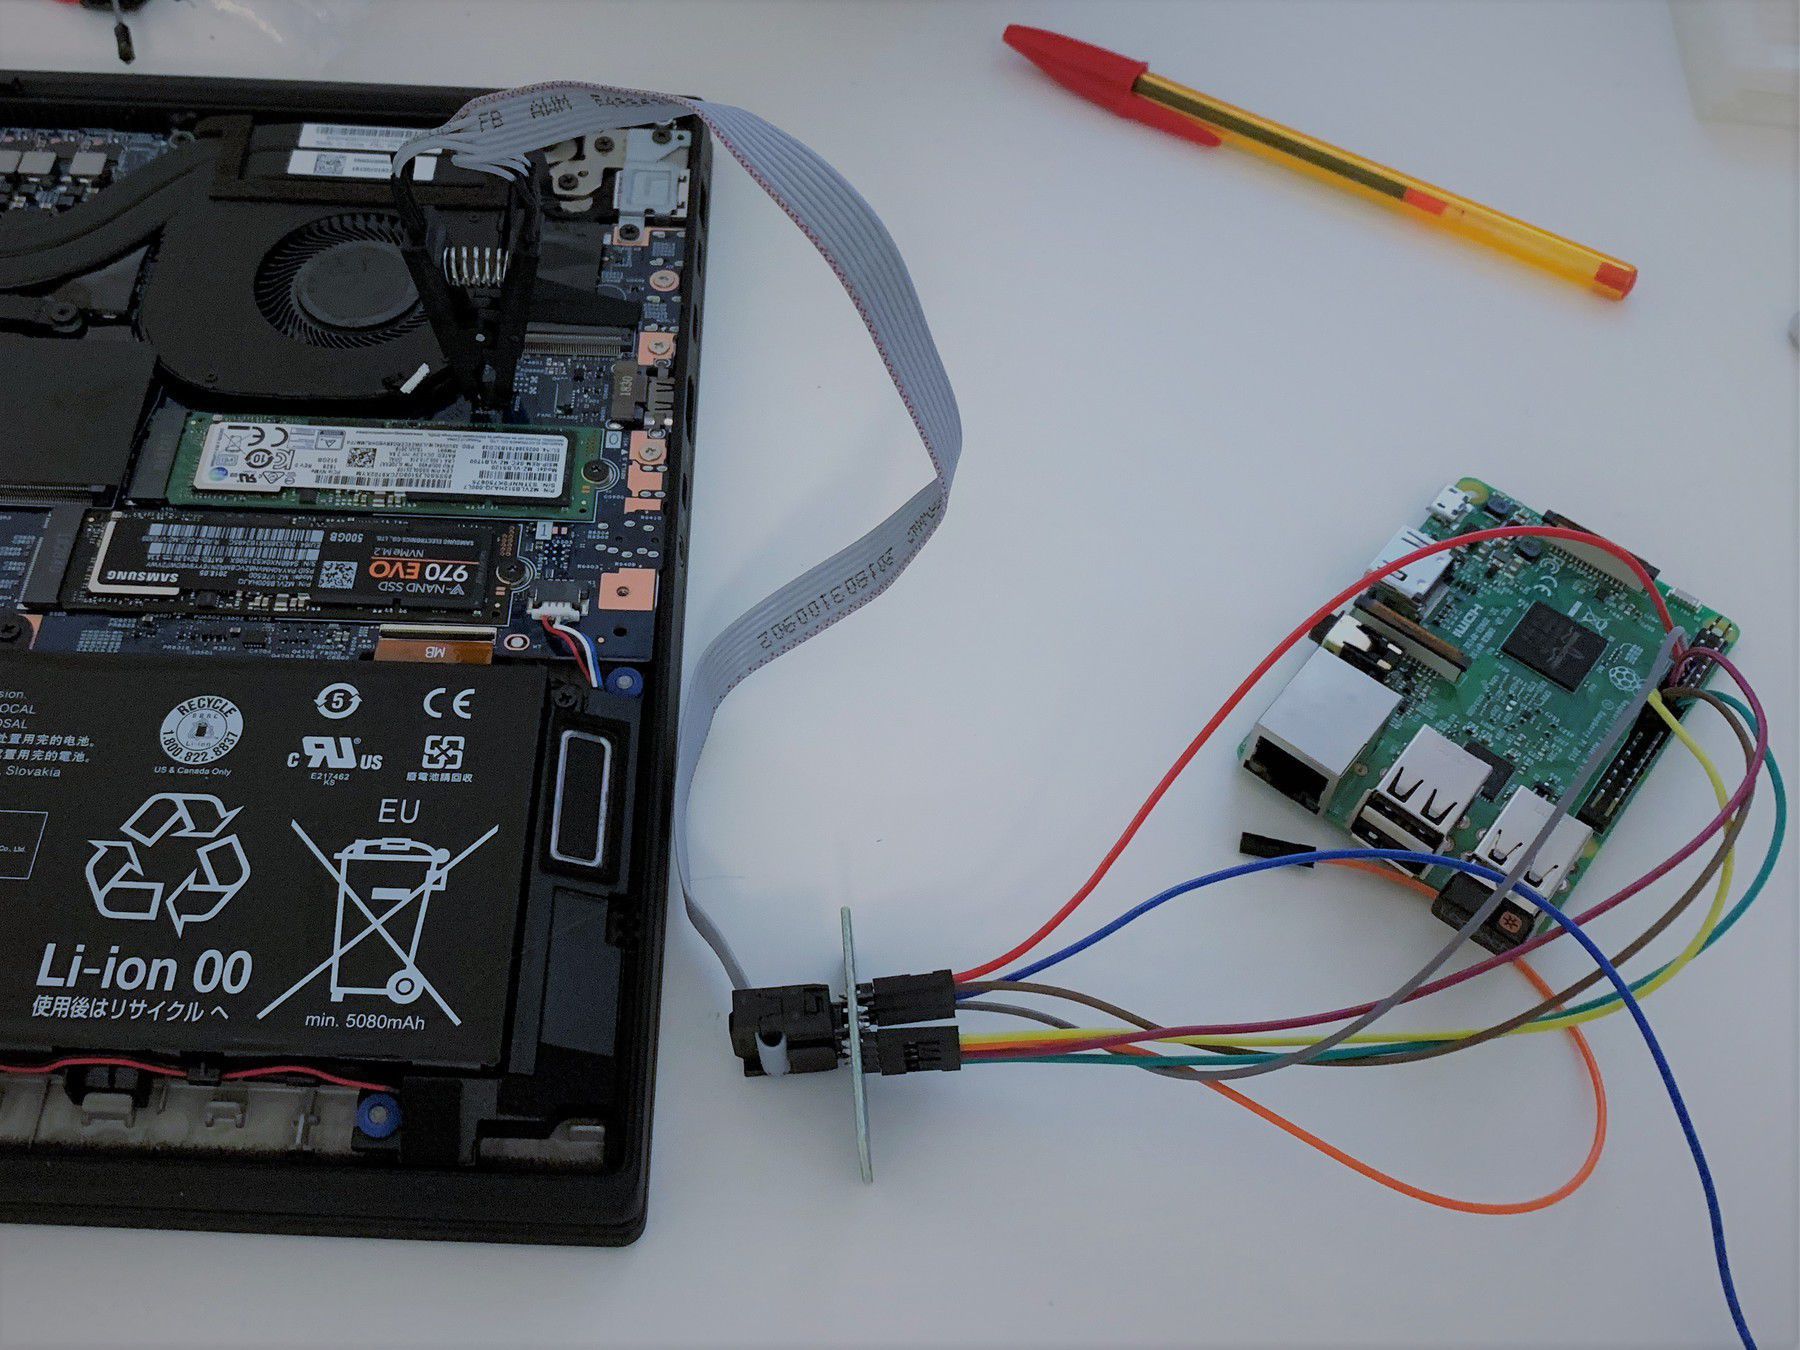
A crucially useful guide by Tom van Veen taught me how to interface properly with the GPIO pins so that I’d have the Raspberry Pi essentially functioning as an SPI interface. I won’t repeat his guide here, since he already documents the procedure so well. Soon, this is what my desk looked like:
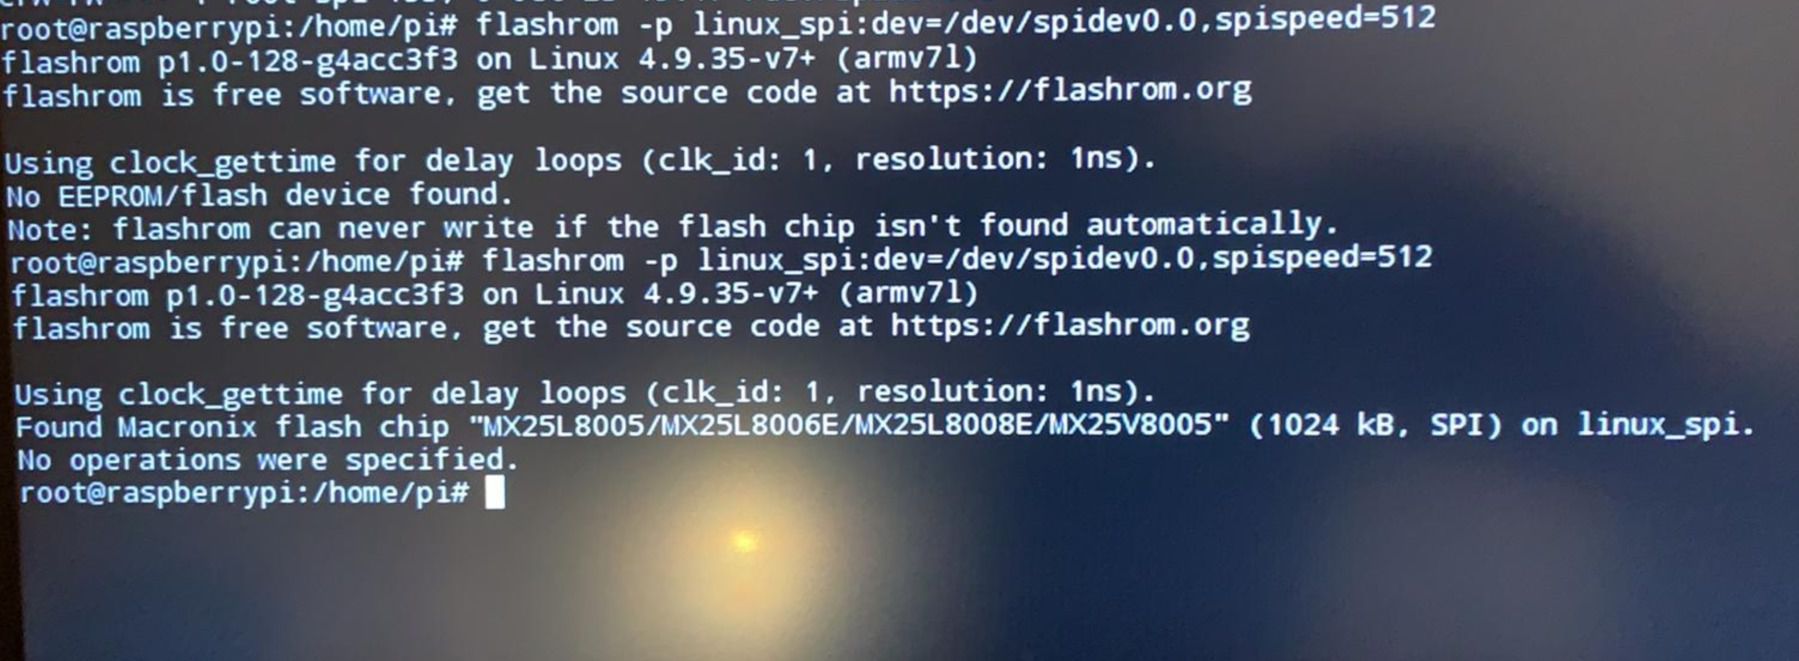
The first thing I did was use Flashrom to read the contents of both the big and small EEPROMs onto my Raspberry PI’s microSD card for safe-keeping:
I then used UEFITool to try and understand what the chips held. This is what UEFITool gave me for the big ROM:
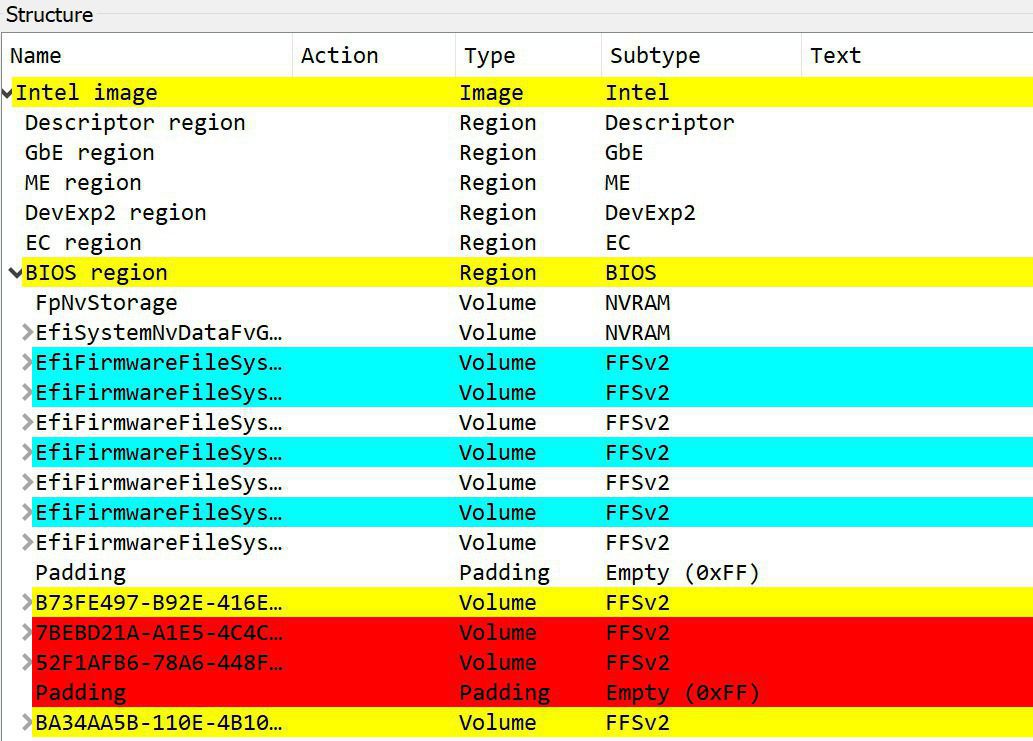
That made sense. The ROM was separated into multiple regions covering the Gigabit Ethernet firmware, something related to the Intel Management Engine, some odd “DevExp2” and “EC” regions and finally the BIOS region, which came in at an offset of 0x1400000. Cool!
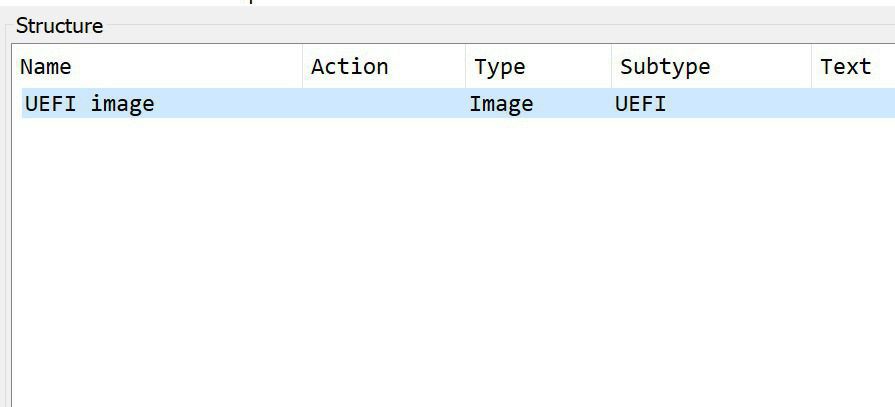
UEFITool was much less descriptive about the small ROM (and the strings I was able to pull out of it using the strings command seemed to all be pretty random), but that was okay, since I was pretty sure by then that the big ROM held the BIOS:
I now needed to find a “fresh” BIOS image and hope that simply reflashing it would work out. I downloaded the BIOS update tool for the ThinkPad P1 from Lenovo’s website and eventually figured out that I could use UEFITool to extract a fresh BIOS image from inside the .FL1 file that the installer extracted onto disk to be flashed by the accompanying Windows exectuable (an .FL2 file contained what appeared to be the “EC Region” binary.)
(A small note: For some reason, the .FL1 file contained two exactly identical copies of the BIOS stored right after each other in UEFI format. I was never able to understand why and did confirm that the two BIOS regions within that file were completely identical. Oh well.)
I extracted the fresh BIOS and created a modified version of the “big” ROM where the “fresh” BIOS was injected started at 0x1400000. Then it was time to flash the modified BIOS back into the big EEPROM chip:
Lo and behold, the computer did something! I got some kind of bleeping and blooping going on, and this would have been the end of it were it not for an unexpected obstacle: the ThinkPad detected that the BIOS had been messed with and was failing a CRC check. It would have allowed me through anyway, but because I had set a supervisor BIOS password before this entire story, it would not allow that security reset to happen despite my re-entering the correct supervisor password. I suspect that if you ran into this same issue but hadn’t set a supervisor password, you’d probably have been fine at this point: I was thwarted by an unlucky tangential circumstance and was ultimately not able to get past the BIOS’s self-test in order to boot.
Things looked pretty hopeless at this stage, but I pressed on. The first thing I did was flash the original backup I had of the big ROM back onto the chip. This was successful and I was again stuck at the black screen with a single unblinking underscore. Sigh.
The Moment of Revelation
But, wait a minute! Didn’t the problem start when I modified something having to do with the Thunderbolt BIOS settings?
And wasn’t the smaller EEPROM chip located right next to the Thunderbolt ports?!
Suddenly it all hit me. I picked up my SOIC8 clip, plugged it into the small EEPROM and tried something crazy: I created a 1MB ROM image filled with just zero bytes and went ahead and completely zerofilled the smaller chip.
Everything worked. My ThinkPad booted. I was back on Windows. I ran a full Lenovo hardware diagnostic and everything was working perfectly. I literally jumped for joy. It was an incredibly happy and genuine Eureka moment. It felt like the day I fell in love with computing. I mean it.
I later discovered that the Thunderbolt ports weren’t working, but the solution for that was at that point dead obvious. I went and downloaded the ThinkPad P1 Thunderbolt firmware from Lenovo’s website. I had to flash it manually using the Raspberry Pi, since the chip was so dead that the bundled Windows executable wasn’t even detecting it! But when I did, everything worked perfectly again: I was able to transfer files over Thunderbolt as well as connect displays and chargers (I had to pad the firmware I extracted from the installer with zero bytes before flashing it.)
Update (Nov. 6, 2018): I can confirm that first zerofilling the Thunderbolt firmware chip and booting is necessary to fix the problem. Flashing the original Thunderbolt firmware before zerofilling the Thunderbolt chip and booting will not fix the issue.
Hear me, Internet! There is no need to RMA your ThinkPads! This problem is solvable!
I would have never had this adventure if it weren’t for Jason’s encouragement. I strongly recommend you check out his work on WireGuard, which I already teach a whole session on at my NYU computer security course.